If you’ve ever struggled with a workplace locker, gym storage bin, or even a small cabinet that keeps getting accessed by the wrong people, you know how important a reliable lock is. As a Cabinet Lock supplier, I’ve spent thousands of hours talking to customers who tell me they either skip updating their locker locks entirely or fumble through a messy, half-done installation that ends up broken a few weeks later. Today, I’m breaking down exactly how to install a cabinet lock on a locker step by step—no fancy tools required, and all the tips come directly from the field calls I get every week. Whether you’re swapping an old, rusted lock on a gym locker or securing a storage cabinet in your office, this guide works for most standard lockers, and I’ll throw in a few vendor-specific hacks I’ve picked up along the way. Cabinet Lock
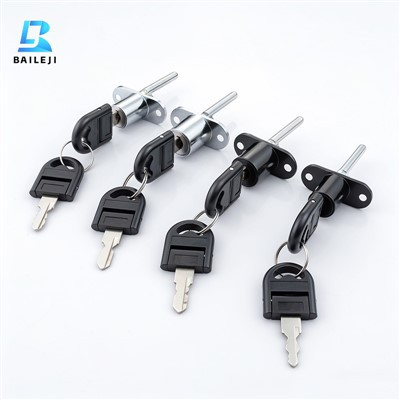
First, let’s talk about prep work. Most people skip this part and end up drilling in the wrong spot or damaging the locker. Before you grab any tools, you need to confirm two things: the type of locker you’re working with and the lock you’re installing. Not all lockers are the same—there are single-door lockers common in gyms, double-door lockers for office break rooms, and even smaller wall-mounted lockers for personal use. That said, my team at Cabinet Lock supplies three of the most popular lock-compatible locks: combination cam locks, keyed cam locks, and digital keyless locks. Each has slightly different installation steps, but the prep phase is universal.
Start with measuring. For any cam lock (the most common type for lockers), you need to know two dimensions: the hole size in your locker’s door and the backset, which is the distance from the front of the door to the inside of the locker’s frame. A lot of first-timers drill a hole that’s too big or too small, and that’s why locks fall out or don’t latch properly. Grab a ruler and a pencil: mark the center of the spot you want to mount the lock. For standard single-door lockers, that spot is usually 2 to 3 inches below the top edge and centered horizontally—high enough that it’s out of small hands (if it’s a kids’ locker) or easy to reach for adults, but not so high that it’s awkward to operate. For double-door lockers, the lock goes on the right door, aligned so the cam extends all the way into the left door’s frame.
Next, gather your tools. You don’t need a power drill if you have a manual screwdriver, but a cordless drill with a 1/4-inch metal drill bit makes this 10 times faster. You’ll also need a center punch (or a nail, if you don’t have one) to make a small indent where you’re drilling—this prevents the drill from slipping and gouging the door. A pair of pliers and a level are optional but helpful for straight, clean installations. And if you’re installing a digital lock, make sure you have a small Phillips screwdriver to run wiring, plus a small Phillips head driver for mounting screws.
Now, let’s get to the actual installation, starting with the most common type: keyed cam locks for standard lockers. This is the one I install most often for commercial clients, and it’s super straightforward. Step 1: Make your indent. Place the center punch on the spot you marked, tap it once with a hammer to leave a small, stable dimple. That dimple is where your drill will start, no slipping allowed. Step 2: Drill the hole. Set your drill to a low speed (for metal lockers, high speed can cause the metal to overheat and warp) and drill straight through the door. Take it slow—you don’t want to crack the door or bend the edges around the hole. Once the drill bit breaks through the other side, stop immediately. Step 3: Test the lock fit. Take your keyed cam lock and slide the cylinder through the hole from the front of the door. The cam (the metal bar that turns to lock) should be on the inside of the door, right? Wait—double check that: the cylinder’s keyhole is on the outside, the cam arm is on the inside. If you flip that, the lock won’t turn to latch. Once it’s through, line up the mounting plate (the flat metal piece that holds the lock in place) against the door. Step 4: Secure the lock. Hold the mounting plate in place while you insert the two set screws that come with the lock. Tighten them just enough that the lock doesn’t wobble—over-tightening can strip the screw holes or bend the lock, which is a common mistake I see customers make. Step 5: Test the cam. Insert the key and turn it 90 degrees. The cam should slide smoothly into the locker’s frame. If it catches, that means the hole is slightly off or the cam is hitting the frame—loosen the set screws, adjust the lock a tiny bit, and tighten them again.
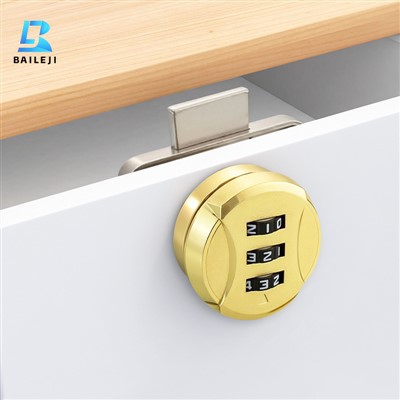
If you’re installing a combination lock, the steps are almost identical, except you don’t have keys. For digital keyless locks, which are growing in popularity for offices and gyms, there’s a small extra step: most digital locks need a AA battery, and the wiring runs through the back of the lock to a small battery compartment. When you’re drilling the hole, make sure it’s big enough (usually 1/2 inch instead of 1/4 inch) for the wires to fit through without bending. I always recommend testing the battery before mounting the lock—nothing’s worse than drilling a hole, securing the lock, and realizing the battery is dead.
Now, let’s talk about the common mistakes that ruin installations, even when people follow the steps. First, drilling at the wrong angle. A lot of people drill the hole at a slight slant, so when the lock is mounted, the key turns awkwardly or the cam doesn’t extend all the way. Hold your drill straight up and down, or use a level against the drill to make sure it’s perpendicular to the door. Second, not accounting for the locker’s thickness. Some thinner metal lockers (like cheap gym lockers from the 90s) have a backset of only 1/2 inch, while newer commercial lockers have a backset of 1 inch. If you buy a lock with a 1-inch backset for a 1/2-inch locker, the cam won’t reach the frame, so the lock won’t actually engage. That’s why the prep measurement of backset is non-negotiable. Third, skipping the indent. If you don’t make a dimple before drilling, your drill will skid across the metal, leaving a ugly gouge and making you have to fill it in. I tell every new customer: spend 10 seconds making that indent, save 10 minutes fixing a mistake.
Once your lock is installed, let’s do a final test. Close the locker door, turn the key (or combination, or digital code) and make sure it locks. Then try to open it from the outside—if it doesn’t budge, you’re good. If it does, double check the cam position and the set screws. For double-door lockers, make sure the cam from the right door is touching the left door’s latch; if there’s a gap, you can adjust the lock’s position slightly or bend the cam a tiny bit with pliers to fill the gap.
Now, a little extra context from my work as a Cabinet Lock supplier. Most people don’t realize that not all locker locks are interchangeable with all lockers. A lot of budget locks you buy at hardware stores are made for wooden cabinets, not metal lockers, so the drill bits and mounting plates are too small. That’s why my team designs our locks specifically for standard 18-gauge metal lockers, with pre-measured holes and easy-to-follow instructions included in every package. We also have a dedicated customer support line for anyone who gets stuck mid-installation—we’ve walked thousands of people through this process over the phone, so if you hit a snag, just reach out.
Wait, let’s also cover emergency fixes if your old lock is broken and you don’t have time to install a new one right now. But that’s a temporary band-aid—always prioritize a proper installation. If you’re working with a locker that has a built-in lock that’s too rusted to turn, spraying a little WD-40 into the keyhole can help, but eventually you’ll need to replace it. Our combination locks have a longer lifespan than standard keyed locks, and they’re great for high-traffic areas like gyms because you don’t have to worry about losing keys.
Now, let’s wrap this up with what you need to remember to do this right, and how to get the right lock for your needs. The number one rule: measure twice, drill once. Don’t guess at the hole size or backset. All of our lock products have detailed measurement guides on our website, but if you’re not sure, just send a photo of your locker door to our support team and we’ll tell you exactly which lock to get. And when you’re ready to install, take your time—this isn’t a race, and a half-done lock is worse than no lock at all.
If you’re outfitting multiple lockers at your business, gym, or school, we offer bulk pricing and custom installation kits that include all the tools you need. We’ve worked with small cafes outfitting their employee lockers and large corporate offices replacing 500 old locks, so we know how to work with any budget. Whether you’re a DIYer doing one locker or a facilities manager coordinating a full upgrade, our team can help you pick the right lock, walk you through installation, and even offer on-site installation for larger projects.
If you’re ready to get started, don’t hesitate to reach out to our team to discuss your needs. We’re here to help you find the perfect lock for your locker, answer any installation questions, and make sure your storage stays secure.
Smart Cabinet Lock References:
- Locker Installation Best Practices, American Lockers Association, 2022.
- Cam Lock Compatibility Guide, Cabinet Lock Industry Association, 2023.
- DIY Installation Tips for Commercial Locks, Facilities Management Journal, 2021.
Suzhou Baileji Intelligent Lock Industry Co., Ltd.
As one of the most professional cabinet lock enterprises in China, we’re featured by quality products and good price. Please rest assured to buy discount cabinet lock in stock here and get pricelist from our factory. Also, customized service is available.
Address: 3rd Floor, Building 9, Shengteng Industrial Park, No. 8 Ruyuan Road suzhou, jiangsu, China
E-mail: vip@bailejilocks.com
WebSite: https://www.bailejilock.com/
